How to Set Up Caller ID for Web Calls
How to Set Up Caller ID for Web Calls
Want your web calls to look professional instead of showing as "Unknown"? Setting up a recognizable caller ID is key. It improves answer rates, builds trust, and ensures your calls aren't ignored. Here's how you can do it with dasfone, a browser-based platform for international calls:
- Why it matters: Calls from "Unknown" numbers are often ignored. Displaying a local or verified number boosts credibility and increases the chances of your calls being answered.
- What you need: A verified dasfone account (no credit card required), a phone number (yours or a new one), an updated browser with microphone permissions, and a minimum $5 account balance.
- How to set it up: Log into dasfone, verify your number (via SMS or voice call), configure caller ID settings in the dashboard, and test your setup with a quick call.
- Key features: Pay-as-you-go pricing, no apps to download, and support for over 200 countries. New users get a $2 sign-up bonus and 25% off their first deposit with the promo code DF25.
Follow these steps to ensure your calls display a verified, recognizable number, improving your outreach and maintaining professionalism.
QuickStart Caller ID Options
Why Caller ID Matters for Web-Based Calling
When making web-based calls, not having a proper caller ID can lead to your number showing up as "Unknown" or "Private." This lack of identification often works against you, as many people - especially businesses - tend to ignore calls from hidden numbers due to concerns about spam or telemarketing [1][5].
Displaying a familiar or local phone number can make a big difference. It increases the likelihood that your call will be answered and improves engagement. This is especially crucial when contacting sensitive institutions like banks, government offices, or other highly regulated organizations, where having a recognized regional number can help verify your identity [3][4].
For businesses conducting cold calls or customer outreach campaigns, having a verified caller ID adds a layer of professionalism. It also protects personal mobile numbers from being exposed, reducing unwanted calls outside of work hours. Plus, it allows multiple team members to use the same business number, maintaining a consistent and professional image [5].
To ensure your calls convey professionalism and meet legal requirements, verify your number with your service provider and secure a legitimate caller ID [3][4].
What You Need Before Setting Up Caller ID
Before diving into caller ID setup, there are a few essentials you need to have ready. dasfone keeps things simple - no credit card is required to create an account, and everything runs directly in your browser [6].
To get started, make sure you have:
- A verified dasfone account (confirmed via email).
- A phone number ready for verification (either your own or a dedicated number).
- An updated browser with microphone permissions enabled [6][3].
- A sufficient account balance to activate calling features. The minimum top-up is $5.00, and dasfone sweetens the deal with a 25% discount on your first deposit [6].
With dasfone's pay-as-you-go model, there are no monthly fees or subscriptions - you only pay for the calls you make. Following these steps ensures a smooth process when setting up your caller ID.
Create Your dasfone Account
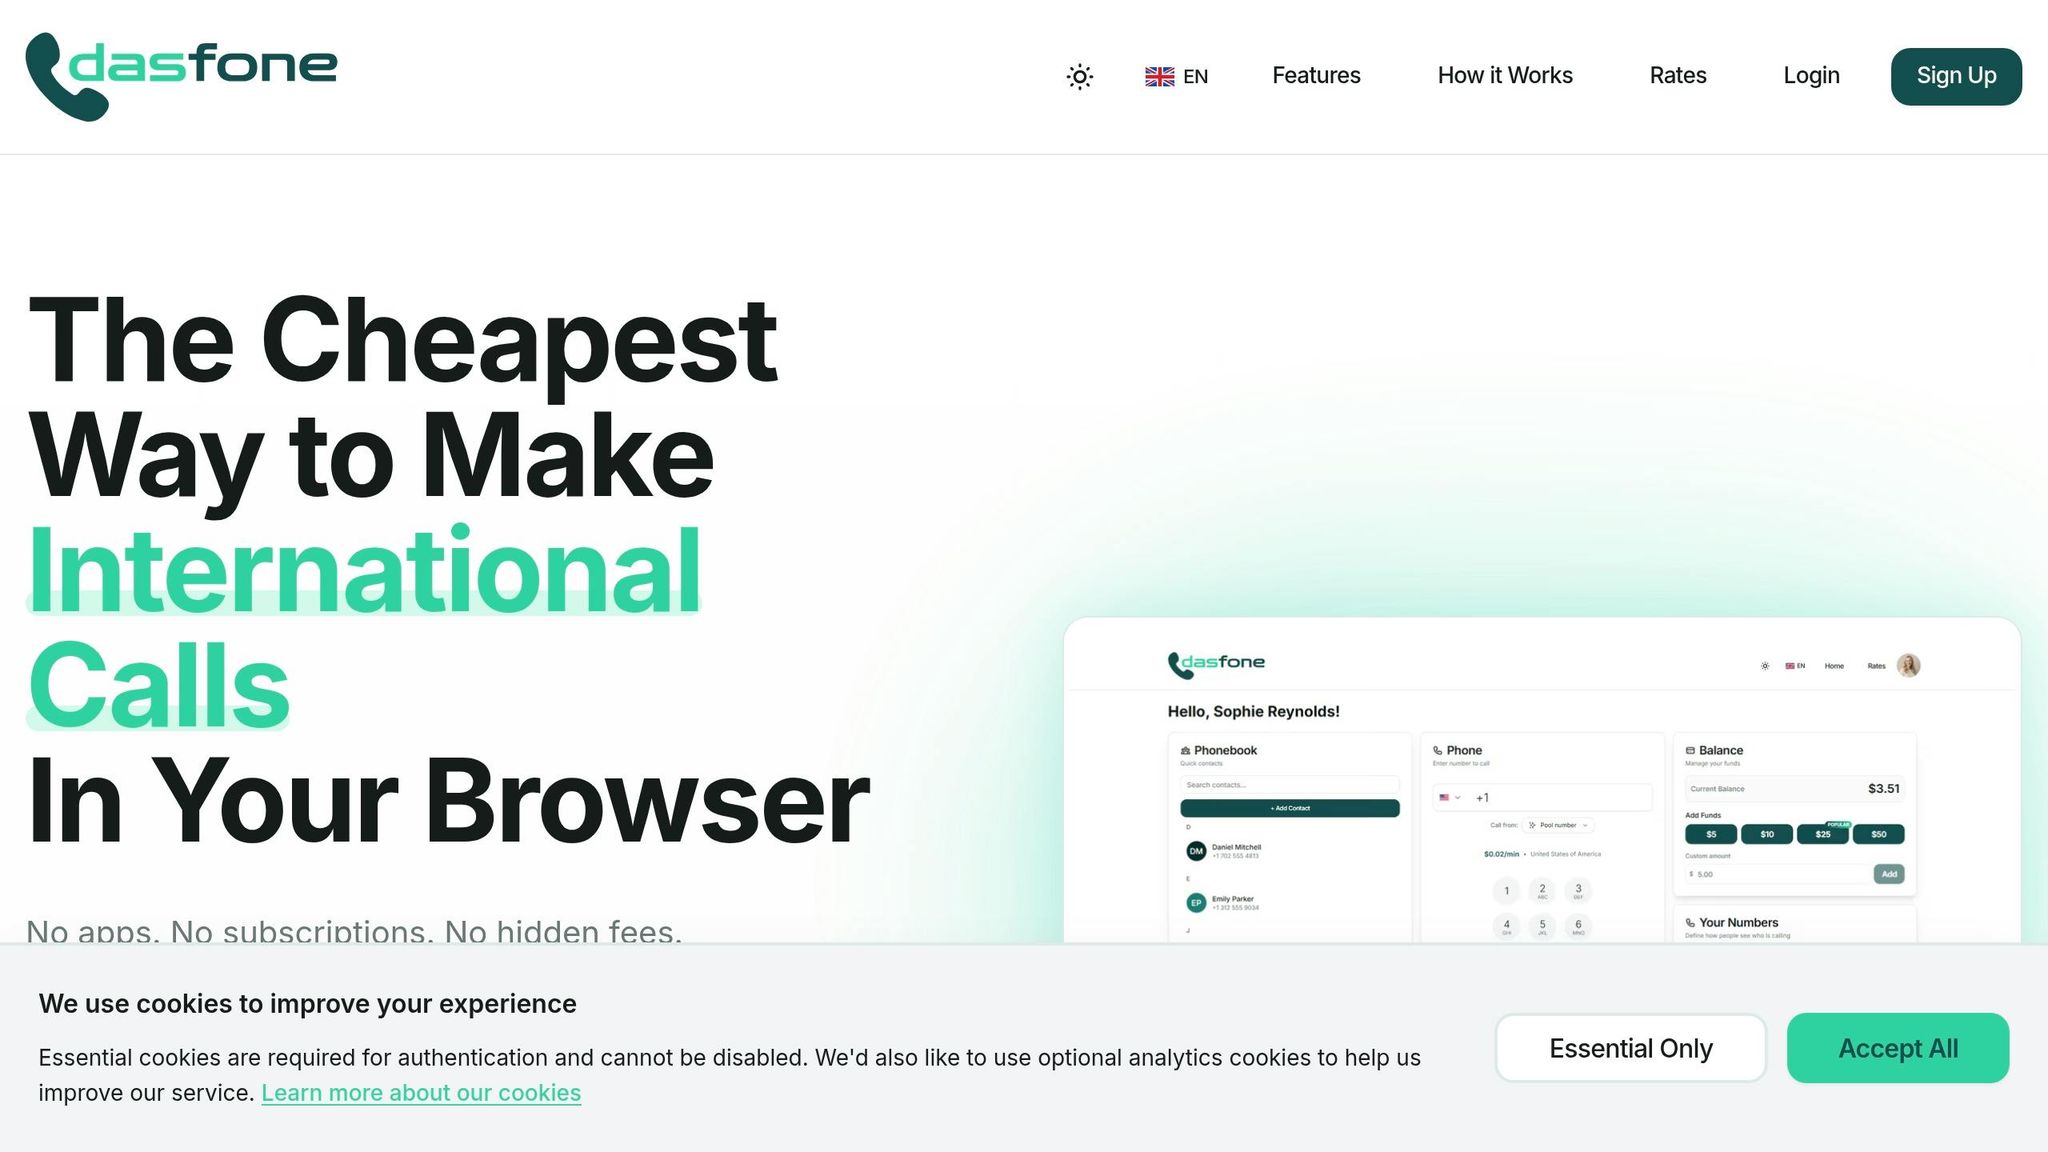
Setting up your dasfone account is quick and hassle-free. All you need is a valid email address - no credit card is required during sign-up [6]. Once registered, you’ll get immediate access to a user-friendly dashboard where you can manage your phonebook, check your credit balance, and configure caller ID settings [6].
The platform is designed for instant use, meaning you can create your account and start making calls almost immediately [2]. Plus, new users get a $2.00 sign-up bonus, which can translate to up to 100 free calling minutes depending on the destination country [6]. If you're topping up for the first time, don’t forget to use the promo code DF25 to enjoy 25% off [2].
Get a Verified Phone Number
To use caller ID for outbound calls, you’ll need a verified phone number. You can either use an existing number or purchase a dedicated number through dasfone [6].
- Using Your Existing Number: Keep your phone handy during setup, as you’ll receive a verification code via SMS or voice call to confirm ownership [3].
- Purchasing a Dedicated Number: This option allows you to bypass verifying a personal number. It’s especially useful for businesses, as multiple team members can share the same professional number for a consistent image [2].
Once your number is verified, you’re ready to move on to browser setup and ensuring your account balance is sufficient.
Check Browser Access and Account Balance
Since dasfone operates entirely in your browser, make sure you’re using a modern web browser on your desktop, tablet, or mobile device [6]. Confirm that microphone permissions are enabled - this is crucial for making calls through the platform [6][3].
Next, check your credit balance in the dashboard. Dasfone displays your balance in real time, and you can easily add funds using the "Add Credits" feature [2]. To avoid interruptions, review the "View Calling Rates" section on the dasfone website to estimate the per-minute costs for your intended destinations [2]. This ensures you won’t run out of credit mid-call.
How to Set Up Caller ID on dasfone
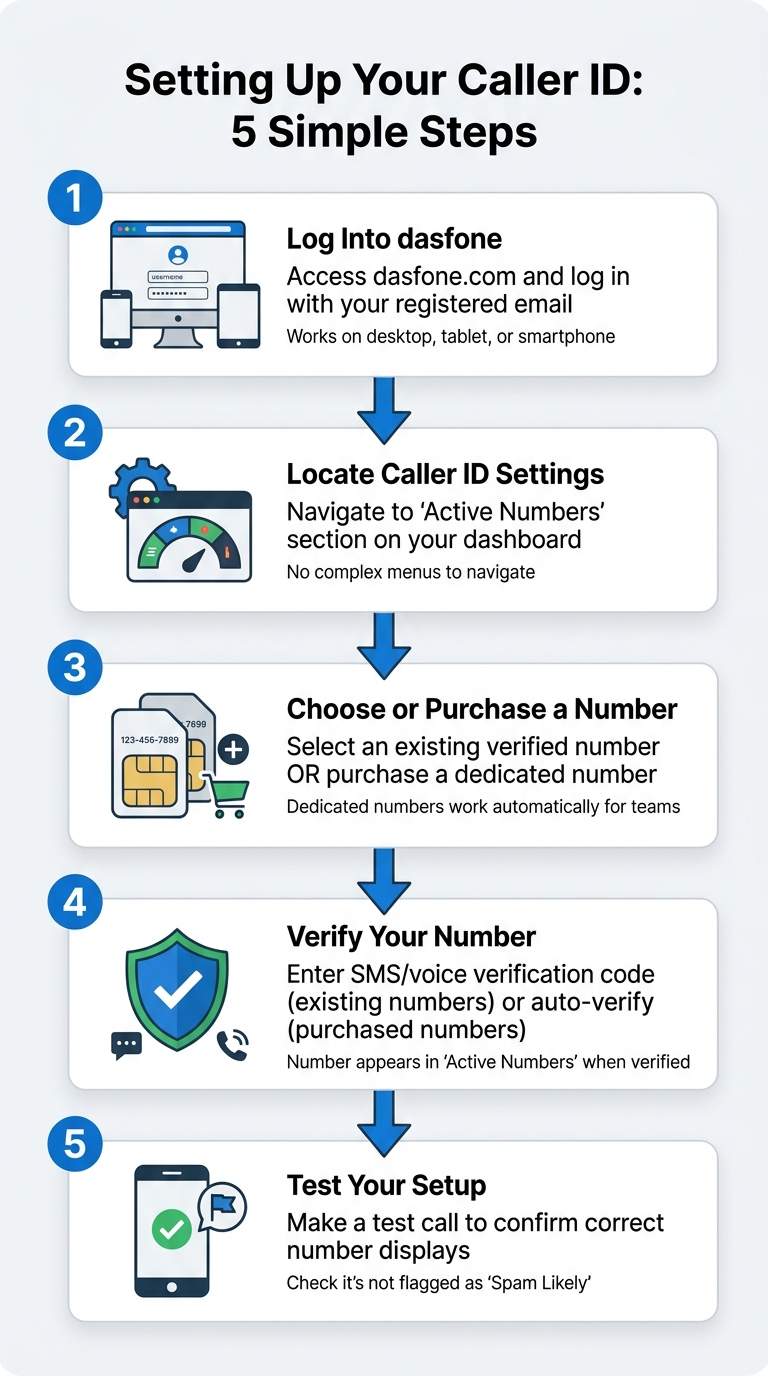
Once your account is set up and your browser settings are good to go, you're just minutes away from configuring your caller ID on dasfone. Here's how to get it done using your browser.
Log Into dasfone
Head over to the dasfone website and log in with the email address you used during registration. The dashboard is designed to be user-friendly and works seamlessly across desktops, tablets, and smartphones. It puts everything you need - your phonebook, dialpad, credit balance, and active numbers - front and center, so there's no need to dig through multiple menus.
Locate the Caller ID Settings
On the main dashboard, find the "active numbers" section. This is where you'll manage the number that displays when you make outbound calls. The setup is straightforward, saving you the hassle of navigating through complex submenus. Once you're there, you can quickly access your caller ID options and choose how you'd like your number to appear.
Choose or Purchase a Caller ID
You have two simple options for setting up your caller ID:
- Add an existing verified number.
- Purchase a dedicated number through dasfone.
"Purchase a dedicated number or add your existing one to display on all outbound calls." – dasfone
Verify Your Caller ID
After selecting your number, the next step is verification. If you're using your own number, dasfone will send you a code via SMS or voice call. Enter this code to complete the process. If you've purchased a number, it will be verified automatically. Once verified, the number will appear in your "active numbers" section, ready to be used.
Test Your Caller ID Configuration
Before making any important calls, it's a good idea to test your setup. Use the web dialpad to make a quick call and ensure the correct number appears on the recipient's phone. Also, check that it isn't flagged as "Spam Likely" by their carrier. If the test call goes through as expected, your caller ID is now fully configured and ready for use.
Customize Your Caller ID Settings
With caller ID enabled, you can tailor its settings to fit different calling needs. The dasfone dashboard allows you to decide which number shows up for every outgoing call, letting you adjust its appearance based on the situation.
Set a Default Caller ID
Your default caller ID is the number that appears automatically on all outgoing calls unless you choose to change it. To set it up, log in to your account, navigate to Settings, and select your preferred number from the Outgoing Caller ID dropdown. This number becomes your primary identifier for manual calls, ensuring consistency without requiring manual selection each time.
Change Caller ID for Individual Calls
Need to use a different number for a specific call? No problem. Before dialing, pick an alternate number from the "From" field in the dialer interface. Just select the desired number from the dropdown, and it will apply to your next call. This feature is perfect for maintaining privacy when making business calls from a personal device or for displaying a local number to build trust with recipients [7].
Manage Caller IDs for International and Local Calls
Once you’ve confirmed your caller ID works through test calls, you can refine it further for regional relevance. For international calls, showing a local number can greatly improve your chances of getting an answer. People are more likely to pick up when the number looks familiar rather than foreign. In the Outgoing Caller ID settings, use the Country and Lines dropdowns to select a number with a specific regional area code [1]. For instance, if you’re calling a business in New York from overseas, switching to a New York area code makes your call appear local. As United World Telecom explains, this strategy "transforms these calls from seemingly random phone numbers into a familiar local business number that is easily recognized by customers and establishes a local presence" [1]. Don’t forget to click Save Settings to apply your changes [1].
Fix Common Caller ID Problems
After testing your caller ID setup, you might run into a few common issues. This guide offers straightforward troubleshooting steps to keep your web calls running smoothly.
Resolve Verification Failures
Verification involves receiving a One-Time Passcode (OTP) via SMS or a phone call to the number you want to use as your caller ID[8]. If you’re having trouble with OTP errors or connectivity, start by testing the number - call it from another device to confirm it can receive SMS or calls[20, 21]. For numbers behind an Interactive Voice Response (IVR) system or an extension, timing is everything. Add "w" characters in the extension to create 0.5-second pauses, ensuring the IVR has time to respond. Also, check that your "Friendly Name" is alphanumeric and under 64 characters; anything longer may be cut off or cause errors. Keep in mind that trial accounts may restrict verification methods to SMS only, so review your account status if problems persist[8]. If verification succeeds but the display is still incorrect, move on to checking your caller ID settings.
Fix Caller ID Display Issues
If your caller ID isn’t showing correctly, the number may not be properly verified or selected in your settings[3]. For a custom caller ID to display, the number must first be verified through dasfone to ensure compliance and proper functionality. Without verification or selection, the display might revert to a public or "Unknown" number. To fix this, check the Outgoing Caller ID white list in your control panel and confirm the number is authorized[1]. Then, go to the Settings menu in your web dialer, re-select the correct "Country" and "Lines", and ensure the verification code was entered accurately[3].
Understand Regional Restrictions
Regional rules can sometimes interfere with caller ID functionality. Many recipients and service providers block or silence calls marked as "Unknown", "Private", or "Restricted" to prevent spam or harassment[9]. Features like *67, which mask caller ID, are often limited to specific regions like the US and may not work for international calls[3]. If calls are failing, check your device or account settings for call barring options that might be blocking connections[9]. As JustCall explains:
"Calling restrictions usually refer to your phone service provider using limits that can include things like overseas charges, unpaid bills, or out-of-plan fees"[9].
To avoid issues with foreign or unknown numbers, consider purchasing a dedicated local number for the country you’re targeting through dasfone’s control panel. This helps establish a local presence and increases the likelihood of successful connections[1][3]. If problems persist after these adjustments, it’s time to reach out to dasfone Support.
Contact dasfone Support
If troubleshooting doesn’t resolve the issue, contact dasfone support with your account information and details about the problem. Use the "Contact Support" option in your dashboard or help center[1]. The support team can investigate account-specific restrictions, check service availability in your region, and help with technical issues that go beyond standard troubleshooting[8].
Conclusion
With your setup complete and troubleshooting tips at your fingertips, you're ready to boost the credibility of your calls. By setting up caller ID with dasfone, your calls will display a verified, recognizable number instead of showing up as "Unknown" or "Private." This simple change can build trust and make it more likely that recipients will answer your calls [1].
The process is simple: verify your existing number or purchase a dedicated local one, then configure everything directly in your browser [2]. This setup not only helps establish a local presence, increasing answer rates, but also eliminates the anonymity that often makes calls look like spam. As United World Telecom points out:
"When a familiar phone number calls – instead of an 'Unknown' or 'Private' number – the recipient is much more likely to pick up" [1].
Whether you're an expat staying in touch, a digital nomad handling client calls, or a business running outreach campaigns, dasfone’s pay-as-you-go pricing and browser-based flexibility allow you to maintain a professional image without the hassle of traditional phone systems [2]. With secure encryption and transparent pricing, you can focus on what matters - your conversations [2].
If you run into issues with verification or caller ID display, the troubleshooting steps in this guide can help you resolve them quickly. For more complex problems, dasfone’s support team is available through your dashboard to assist with account-specific concerns or regional restrictions. Follow the step-by-step instructions in this guide, and start making calls with a professional, recognizable caller ID today.
FAQs
Will my caller ID always show up, or can carriers still label it as spam?
Your caller ID can show a specific number, but carriers might still label calls as spam or even block them. This often happens if they suspect spoofing or fraudulent behavior. Unfortunately, this is determined by the carrier's spam detection rules, which are outside your control.
Can I use one shared caller ID for multiple team members and browsers?
Dasfone lets you choose between using a dedicated number or your existing one as the caller ID for all outgoing calls. This setup allows multiple team members or browsers to show the same caller ID when configured with the same number. For more information about sharing a single caller ID across users or browsers, check out Dasfone’s configuration options or reach out to their support team.
What should I do if my verified number still shows as “Unknown”?
If your verified number appears as "Unknown", check your service provider's settings to ensure your caller ID is set up correctly. Double-check that the correct number is selected and properly registered. Sometimes, delays or configuration errors can lead to this issue. If you’re still facing problems, reach out to your service provider’s support team to confirm that your caller ID is active and configured properly.
Related Articles
Ready to Make International Calls?
Try dasfone today and make your first international call in seconds. No app download, no subscription—just instant, affordable calling from your browser.
Start Calling Now